Dehydrate it Yourself - Backpacking Meals
I have been preparing my own backpacking food for the past 10 years. Whether you’re going out for two, or 200 nights, you’ve got to eat. Especially when you’re pumping out 10-12+ hour days, hauling a pack on your back. As the miles stretch on, food often sits in the forefront of your mind. Unfortunately, choices for food on the trail can be limited. There are options though. Options you can do yourself at home with a little prep and a little dehydration. Meals can come to life at any campsite with just a bit of boiling water. Once you start dehydrating your own meals, you’ll never want to settle for store bought backpacking meals again!
So why DIY? (Dehydrate It Yourself)
Sure you could just buy pre-made camping and hiking food, but here are some reasons why preparing your own food yourself is the way to go:
- It’s cheaper – you can pay up to $11 per serving for store bought brands!
- You can tailor recipes to fit your personal taste; Vegan, Vegetarian, Gluten Free, Raw, etc.
- It’s fun to know the food you’ll be eating on the trail was made by you!
- You can control the portions larger or smaller depending on your personal needs.
- No cleanup if you eat right out of the bags you prep in! (freezer bag cooking).
- You get to hand pick the ingredients – organic/chemical free/ gluten free, etc.
- You can make a lot of different meals to satisfy your taste and appetite!
- It’s easy – the only “cooking” you do on the trail is boil water.
Freeze dried or dehydrated?
When scanning labels of pre-packaged store bought food, you may see the option of ‘freeze dried’ foods. Although freeze dried foods are lighter than dehydrated foods, here are some reasons they aren’t ideal for long hauls:
- The food crumbles easily when crushed
- You can’t rehydrate the food to ‘fresh’
- It often has a chalky texture and little taste
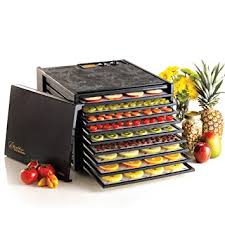
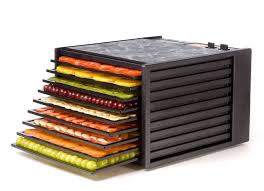
How does dehydration work?
Dehydrated food has actually been practiced for thousands of years, dating back to at least 12,000 BC! Back then, they would use a fire to dry out and smoke the foods, today, you can buy smaller dehydrators perfect for your home kitchen that work almost the same – they warm & evaporate the moisture out of the food. You can even use your oven!
Before you begin:
- Cut all your ingredients into small pieces so they’ll dry quickly and easily. Must be ¼ inch or less!
- Don’t mix foods if you’re making single ingredient snacks – it mixes the flavors. For example, don’t dehydrate strawberries the same time as you’re dehydrating meat. You don’t want meaty strawberries, and you probably don’t want strawberry meats either!!!
- Check the temperature – different foods need different temperatures to make them safe to eat. Make sure you know what settings to put your dehydrator on for your different items.
- Keep them edible – until you’re ready to leave for your trip, keep all your dehydrated food in the freezer to enhance longevity. Always label the food with content and the date you dehydrated the meal on the outside of the bag, but they can last 3 years that way!
- Hold the oil – cook with a minimal amount of oil as oil does not ‘dry’ and can go rancid. Rinse particularly greasy foods – like ground beef – with warm water before you dehydrate them. If in doubt, steer clear of fatty foods like avocado, fatty meats and cheese altogether.
How to: One pot meals:
Think casseroles, stews, hearty soups, one pot meals, and pasta dishes! Simply cook the meal as you normally would – just make sure you’ve chopped all the ingredients into small pieces. After the meal is prepared - just as you would eat it, place it in the dehydrator. After it has dehydrated, store in ZipLock freezer bags (don’t forget to add the name and date on them!!!) and store them in the freezer. BTW, I do recommend ZipLoc brand Freezer bags. You can pour boiling water into them, and they will not melt. When you’re ready for your meals on the trail, add boiling water to cover just past the top of your food, let soak for about 10 minutes. It helps to place the Ziploc bag in some sort of insulated wrap. You can even dehydrate meals from your favorite restaurant! (but beware – restaurant food is often high in grease). There is nothing better than having your favorite curry dish on top of a mountain in the middle of nowhere.
How to: Single ingredient ‘snacks’:
Fresh fruits, and Veggies as snacks – keep the temperature at 115* or lower – this way, you are not ‘cooking’ the food. It may take longer, but it keeps the ‘raw’ goodness of your food. Dehydrated pineapple is particularly tasty!
How to: Smoothies:
Smoothies are perfect for breakfast for nutritional value AND for taste. They’re also super simple to make! Blend ingredients however you typically would – very ripe fruit, oatmeal, quinoa flakes, honey, flax seed and almonds are some ideas. I prefer to use canned coconut milk in my smoothies, but any type of milk works. Dehydrate the mixture until brittle, then break up into pieces to freeze. When the pieces are frozen, break up into smaller pieces and/or grind up in a coffee grinder to make it into a powder. Package in Ziploc’s, and you can drink it straight from the bag! You can add water the night before so it’s ready and waiting for your hungry belly in the morning.
VERY IMPORTANT!
Don’t forget your sweet tooth J Rice pudding, carrot pudding, cake croutons and apple sauce are all super easy to dehydrate and oh so tasty!